 Save
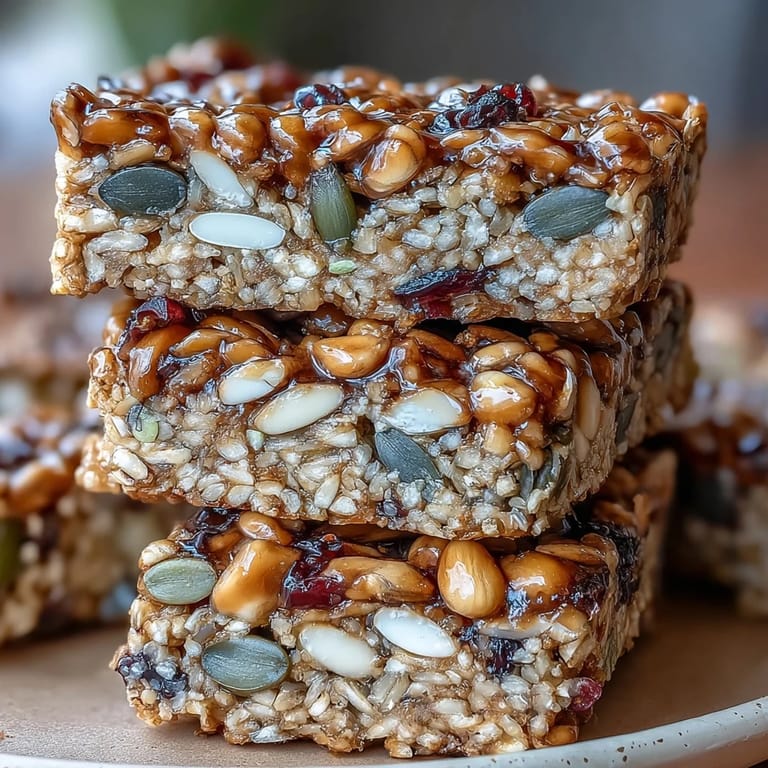
Save The scent of honey warm and fragrant always reminds me of mornings when I’d try to fill the kitchen with something cheerful before anyone else woke up. Making nut-free granola bars was a happy accident one Saturday, when all I had for mix-ins were seeds and a stray bag of dried cranberries—not a single nut in sight. As I pressed the sticky oat mixture into the pan, I realized how much I liked keeping things simple and safe for friends with allergies. The lightly browned bars felt like a small success, sweet and crunchy with just enough chew. There’s a quiet satisfaction in sneaking one out for an afternoon walk or a quick beach snack.
Once, I packed a tin of these granola bars for a family picnic by the river, and before I knew it, everyone was trading bites and guessing what gave them their delicate crunch. My cousin, notorious for forgetting her allergy pills, was delighted to find a treat she could enjoy. There was laughter when someone mistook the mini chocolate chips for raisins, and even the kids enjoyed pressing the mixture into the pan, smudges and all. That day taught me the bars are as much about making people feel welcome as they are about taste. The afternoon ended with only crumbs left—a sure sign they’d won everyone over.
Ingredients
- Old-Fashioned Rolled Oats: Oats give the bars a hearty, chewy texture, and using rolled oats (not quick oats) helps them hold together better.
- Unsweetened Shredded Coconut: Adds subtle richness and fragrance; lightly toasting it makes the flavor pop.
- Pumpkin Seeds (Pepitas): Their nutty crunch is the backbone of every bite, so go for raw seeds to avoid excess salt.
- Sunflower Seeds: Balances texture, and their mild flavor keeps these bars nut-free.
- Dried Cranberries or Raisins: Chop them roughly for even distribution and a little tartness in every slice.
- Mini Chocolate Chips (Optional): A fun surprise, but use dairy-free chips if you want to keep things allergy-friendly.
- Fine Sea Salt: Enhances sweetness and sharpens the flavors—just a pinch goes a long way!
- Ground Cinnamon: Adds warmth and depth without overpowering.
- Honey: Natural sweetness and stickiness are key—if you prefer vegan, maple syrup works just as well.
- Sunflower Seed Butter or Tahini: This is what keeps bars moist and cohesive; sunflower seed butter gives a classic taste, tahini a richer earthiness.
- Coconut Oil, Melted: Helps bind and gives a tender crumb—always measure after melting.
- Pure Vanilla Extract: A splash of vanilla rounds out the flavors; always use real extract for best aroma.
Tired of Takeout? 🥡
Get 10 meals you can make faster than delivery arrives. Seriously.
One email. No spam. Unsubscribe anytime.
Instructions
- Prep the Pan:
- Line your baking pan with parchment, leaving enough overhang so you can lift everything out later. You don’t want to fight the bars after baking—trust me.
- Mix the Dry Ingredients:
- Pour oats, coconut, seeds, dried fruit, chocolate chips, salt, and cinnamon into a big bowl and stir well so every spoonful gets some of everything.
- Warm the Wet Ingredients:
- In a saucepan, gently heat honey, sunflower seed butter (or tahini), coconut oil, and vanilla until smooth and just warm—you’ll hear the aroma before it bubbles.
- Combine and Coat:
- Pour the warm mixture over the dry ingredients and use a spatula to mix until no dry oats remain, scraping the sides for every last sticky bit.
- Pack and Compact:
- Scoop the mixture into the pan and press firmly, smoothing the top as you go; using a measuring cup bottom works wonders for getting an even, compact layer.
- Bake to Perfection:
- Slide the pan in and bake for 20–25 minutes, until golden at the edges and the kitchen smells sweet—the bars should feel set, not loose.
- Cool and Slice:
- Let them cool completely on a wire rack, then lift out by the parchment and cut into tidy bars; patience pays off so they don’t fall apart.
- Store for Later:
- Keep the bars in an airtight container at room temperature, or chill for extra firmness—just stash them where you won’t forget!
 Save
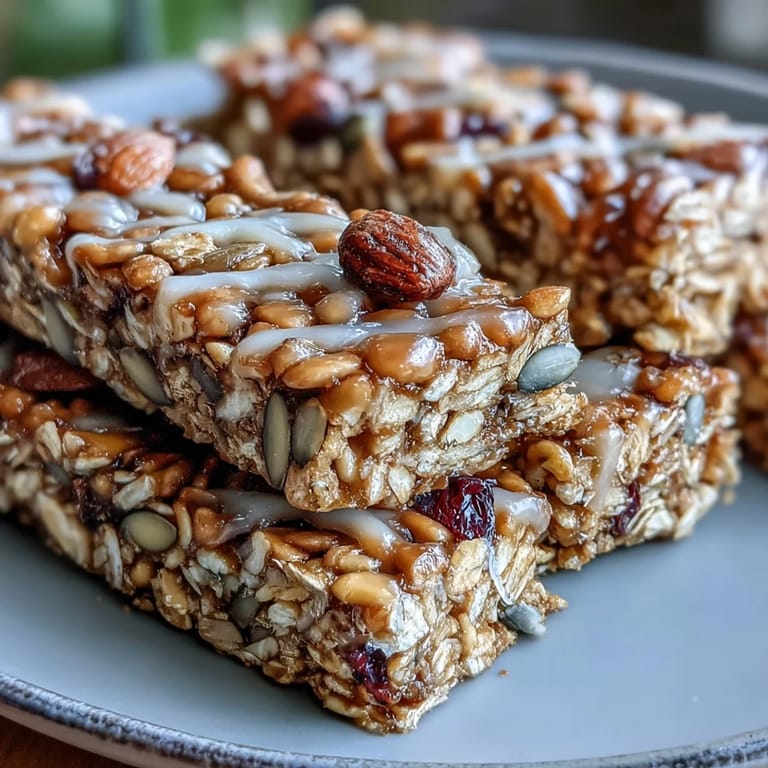
Save These granola bars turned into a ritual for me after I gifted a batch to a neighbor who’d struggled to find snacks her kids could take to school. She later told me one child called them “magic breakfast bars,” and suddenly I was baking more, just to share. Somehow, these simple bars became little tokens of care, and I found myself tucking them into lunch bags more often than not.
Swaps and Additions
Experimenting with different dried fruits—like chopped apricots or cherries—gave the bars a whole new personality. Toasting the oats and seeds beforehand adds even more crunch, but it’s not a step you have to follow every single time. Sometimes, I sneak in flax seeds for extra nutrition, or switch the coconut oil for melted butter depending on who’s eating. The beauty is, you can tailor these bars to whatever’s sitting in your pantry. If chocolate chips don’t suit your mood, leave them out—no one’s judging.
Allergen-Friendly Snack Options
I’ve learned to double-check every label, especially when making the bars for someone with sensitive allergies. Sunflower seed butter and tahini can be found in allergy-safe brands, and vegan chocolate chips make it easier to keep everything dairy-free. It’s comforting to know that with a few mindful swaps, these bars work for almost everyone, so long as coconut and sesame are checked for sensitivities. Allergy-friendly granola bars are a relief for playdates—and they always disappear fast.
Packing and Storing Tips
Parchment paper makes lifting the bars out super easy and helps them stay in one piece. Storing in layers with parchment between keeps them from sticking or crumbling—especially on humid days. A quick tip is to wrap individual bars for grabbing on the go so nobody has a reason to skip breakfast.
- Let bars cool fully before slicing for perfect edges.
- Store in layers to prevent sticking.
- Refrigerate if you want them extra firm or traveling on a hot day.
 Save
Save With each batch, these granola bars remind me that simple ingredients and the right timing turn ordinary moments into memorable snacks. Enjoy sharing them with your favorite people—or just keep a stash for yourself!
Recipe FAQs
- → Can I substitute honey for another sweetener?
Yes, maple syrup or agave nectar are great alternatives for vegan or different flavor profiles.
- → What makes these bars nut-free?
Using seeds and coconut instead of nuts ensures the bars are free from common nut allergens. Always check label details.
- → How should I store the granola bars?
Keep the bars in an airtight container at room temperature for up to a week, or refrigerate for longer freshness.
- → Can I use other dried fruit or seeds?
Absolutely, customize with your preferred dried fruit, seeds, or dairy-free chocolate chips for added flavor.
- → Is coconut considered a nut allergen?
Coconut is treated as a tree nut for some individuals; confirm with your allergist before using.
- → Is it necessary to toast oats and seeds?
No, but toasting them before mixing adds extra crunch and a deeper flavor to the bars.